Important Disclaimer
BatteryStorageHQ provides educational content and estimates only. We are not certified installers, financial advisors, or electricians. Always consult with licensed professionals.
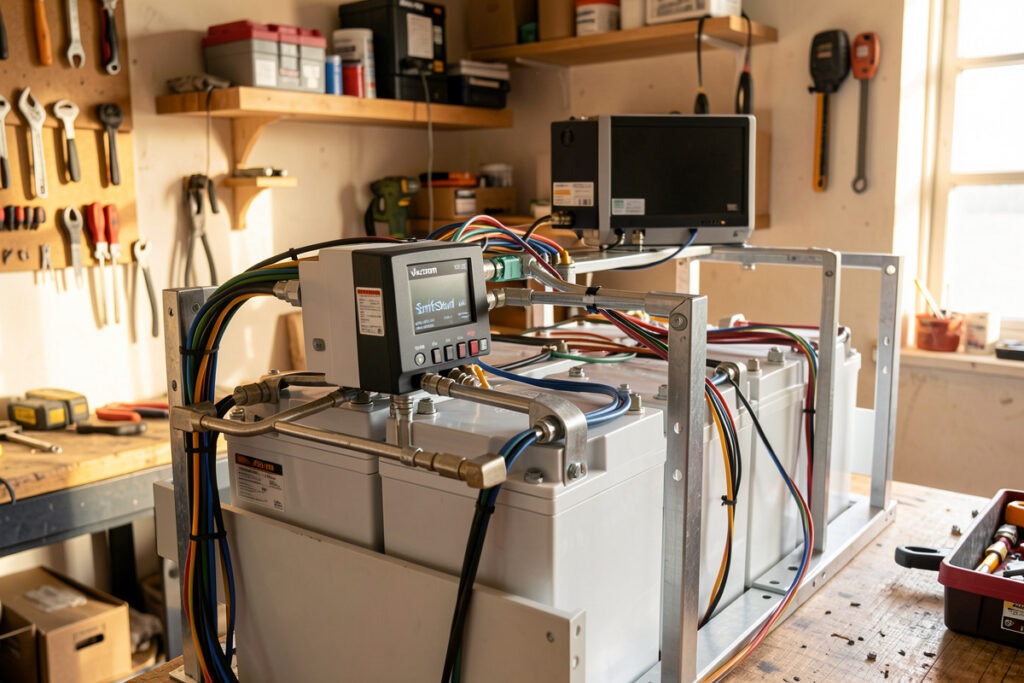
A shunt-based monitor like the Victron BMV-712 or SmartShunt counts every amp in and out (coulomb counting) instead of guessing state of charge from voltage. On my 16S LF280K bank that means I read true SoC within ~1% even mid-discharge, where the flat LFP curve makes voltage useless.
I have run both the BMV-712 and the SmartShunt on the same bank over years, and they are the reference for a reason: a calibrated shunt sitting in the battery negative is the only honest SoC source you can trust on lithium iron phosphate. This guide is the exact install and configuration I use on my bench, the settings that make the number real, and how I decide between the two units.
Why coulomb counting beats voltage on the LFP curve
Lithium iron phosphate sits between roughly 3.20V and 3.35V per cell for almost the entire usable range. That is a 51.2V to 53.6V pack window covering maybe 80% of capacity, so reading SoC from voltage on LFP is hopeless. A shunt sidesteps that by counting charge.
A shunt is a precision low-resistance bar in the negative line. The monitor measures the tiny millivolt drop across it, converts that to amps, and integrates current over time. That is coulomb counting, and it is why a shunt knows you have pulled 140Ah out of a 280Ah cell when the pack voltage still reads a lazy 52.8V. Voltage-based fuel gauges and most cheap inverter SoC readouts simply cannot do this on a flat chemistry. If you want the deeper theory, I walk through it in my battery monitoring guide hub.
The catch is drift. Coulomb counting accumulates small measurement errors, so it needs a periodic reset to a known reference point. That reference is a real full charge, and getting the monitor to recognize one is the single most important configuration step. I cover the manual reset workflow in detail in my state of charge calibration walkthrough.
People ask why they cannot just trust the SoC their all-in-one inverter shows. The honest answer is that most inverter SoC readouts are voltage-flavored estimates dressed up as percentages, and on LFP that estimate is worthless across the flat plateau. Some better all-in-ones do their own coulomb counting through an internal current sensor, but the sensor is rarely as precise as a dedicated 50mV shunt, and you cannot tune Peukert or charge efficiency the way you can on the Victron. When my SmartShunt and my inverter disagree by 8% at 50% SoC, I trust the shunt every time, and the bench confirms it.
BMV-712 vs SmartShunt: which one to buy
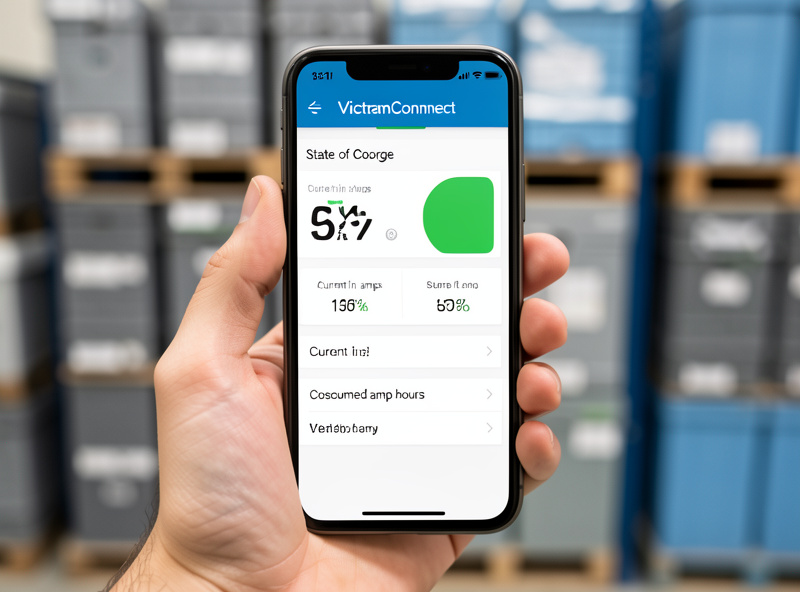
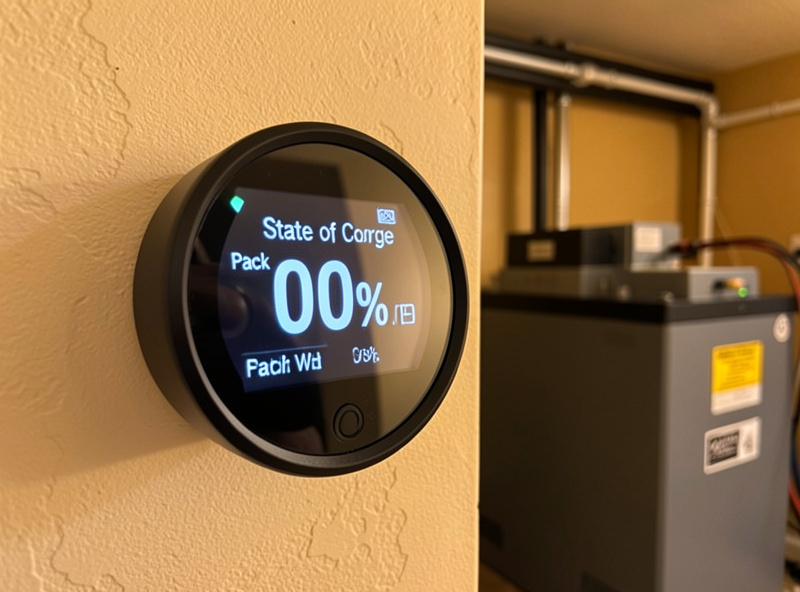
Both units use the identical 500A/50mV shunt and the same firmware brains. The only difference is the interface: the BMV-712 ships with a round panel-mount head unit display, while the SmartShunt has no screen and is read entirely over Bluetooth in the VictronConnect app. The shunt and accuracy are the same.
My rule is simple. If you stand in front of the bank and want a glanceable physical readout, or you are putting one in a van where a dash gauge is satisfying, buy the BMV-712. If you live in the app and log everything to Home Assistant like I do, the SmartShunt is cheaper, smaller, and one fewer cable to run. On my main bank I run a SmartShunt because the data lands in my dashboard anyway; the head unit would just gather dust.
Physical install: the shunt goes in the negative
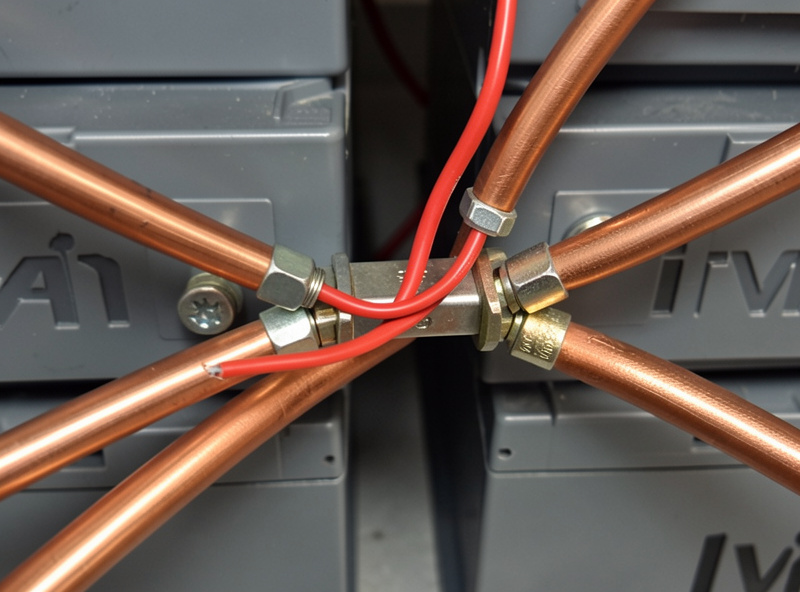
The cardinal rule: the shunt sits in the battery negative line, and absolutely everything except the battery itself connects to the load side of the shunt. The battery negative terminal goes to one stud (marked BATTERY ONLY), and every other negative wire in the system lands on the other stud.
That “battery only” stud is sacred. If you bolt a single load or charge negative onto it, that current bypasses the shunt and your SoC count silently goes wrong by exactly that much. On my bench I have traced a 3% per day SoC drift to one accessory ground that crept onto the wrong stud. Inverter negative, MPPT negative, DC distribution negative, every shunt-side return all land on the load stud.
The small B1 sense wire (the thin red lead) carries no real current; it only tells the monitor the full pack voltage so it can show voltage, power, and on the BMV-712 the mid-point monitoring. Run it from the battery POSITIVE down to the shunt’s sense terminal, and fuse it. I put a small inline fuse (1A is plenty) on that positive sense lead right at the battery post, because it is a thin wire connected to full pack positive and an unfused short there is a fire. This is separate from your main system protection: the bank itself still gets a properly rated DC-rated Class-T fuse on the main positive, sized to your inverter, not the sense fuse. If you want a refresher on protection and the BMS layer, my BMS guide covers it.
As an Amazon Associate I earn from qualifying purchases. If you are sourcing one, a quick search for the Victron SmartShunt 500A turns up the genuine unit; avoid the unbranded clones that share the look but not the calibration.
The settings that make SoC honest
A shunt out of the box will read garbage on LFP until you set six numbers correctly. These live under battery settings in VictronConnect. Get these right and the monitor tracks within ~1%; get them wrong and it lies confidently.
Here is exactly what I run on my 16S ~280Ah bank, and why each one matters:
- Battery capacity: set the real bank Ah, not nameplate ambition. My bank is 280Ah, so I enter 280Ah. The monitor needs the true capacity to convert consumed Ah into a percentage.
- Charged voltage: this is the voltage that, combined with low tail current, signals “full.” For a 16S LFP bank I set it around 54.0V (about 3.375V/cell), comfortably below my 55.2V absorption but high enough that it only trips on a genuine full charge.
- Tail current: the percentage of capacity the charge current must drop below to count as full. I run 2%. On a 280Ah bank that is 5.6A; when absorption tapers below that at full voltage, the bank is truly topped.
- Charged detection time: how long both conditions must hold before the monitor declares 100%. I use 3 minutes so a momentary voltage blip from a cloud passing the array does not falsely reset SoC.
- Peukert exponent: 1.05 for LiFePO4. LFP barely loses capacity at higher discharge rates, unlike lead-acid (1.25+), so the near-1.00 value keeps the count accurate under load.
- Charge efficiency factor: 99% for LFP. Lithium is nearly lossless on charge, so almost every amp you put in comes back out. Lead-acid would need ~90%.
How the monitor re-syncs to 100%
The whole system hinges on the synchronization event. When pack voltage stays above your charged voltage AND charge current stays below your tail current for the charged detection time, the monitor resets its counter to 100% and clears accumulated drift. That is the reference point coulomb counting needs.
This is why a bank that never reaches a true full charge slowly loses accuracy: with no sync event, drift accumulates unbounded. On a solar-only setup that floats at partial state for cloudy weeks, I make sure the bank hits a full absorption at least every week or two. In my Home Assistant logs I can watch the consumed Ah snap back to zero the instant the sync fires, and if it never fires I know my charged voltage or tail current is set too aggressively. You can force a manual “synchronize to 100%” in the app, but treat that as a calibration crutch, not a routine.
| Feature | BMV-712 | SmartShunt | BMS-calculated SoC |
|---|---|---|---|
| Method | Coulomb counting (shunt) | Coulomb counting (shunt) | Coulomb counting + voltage estimate |
| Display | Round head unit + app | App / Bluetooth only | Varies; app or screen |
| Shunt | 500A / 50mV | 500A / 50mV | Internal to BMS |
| SoC accuracy on LFP | ~1% (calibrated) | ~1% (calibrated) | 2-5%, drifts without full charges |
| Logging | VE.Direct to Cerbo/Pi | VE.Direct to Cerbo/Pi | RS485/CAN, BMS-dependent |
| Best for | Glanceable physical gauge | App-and-dashboard users | Already-integrated systems |
State of health, history, and logging
Beyond live SoC, both units keep a history log: deepest discharge, average discharge, total Ah cycled, number of full charges, number of full discharges, and the lowest and highest pack voltage ever seen. I check this monthly the same way I check cell drift, because a creeping deepest-discharge number tells me my loads grew before I notice it any other way.
For real trending I run VE.Direct out of the shunt into a logging device. A Victron Cerbo GX is the clean option; a Raspberry Pi running Venus OS does the same job for less. From there the data flows to my Home Assistant dashboard alongside per-cell voltage from the BMS. If you want to build that pipeline, I document the full stack in my Grafana and InfluxDB monitoring build, and the remote-access side in my remote monitoring setup. Note the shunt reports pack-level SoC and current; it does not see individual cells, so it complements but never replaces the BMS. For the long game, I fold these history numbers into the routine in my long-term health guide, and I pull inverter data alongside it per my smart inverter monitoring notes.
One detail worth flagging from years of running these: the VE.Direct port and Bluetooth both stay live, so you can log to a Cerbo and still pull the unit up in VictronConnect on your phone for a quick check. I keep firmware current through the app, because Victron has shipped real improvements to the synchronization logic over the years. The temperature sensor accessory is also worth fitting on the SmartShunt; it reads battery terminal temperature, and in my logs that has caught a loose, warming busbar lug before it became a problem. None of that changes the core SoC math, but it is the difference between a monitor you glance at and one you actually trust to run the bank unattended.
Common install mistakes I see
The two errors that wreck shunt accuracy are both wiring, not settings. First, a negative wire on the BATTERY ONLY stud, which bypasses the shunt and silently corrupts the count. Second, an unfused or oversized B1 sense lead. Fix the wiring before you ever blame the firmware.
The third common one is leaving the factory defaults in place. The Victron ships configured for lead-acid: Peukert near 1.25, charge efficiency around 90%, and a charged voltage that an LFP bank never reaches. Drop a shunt in with those defaults and your SoC will be wrong by double digits within a day. I have walked enough people through this on my bench to know it is almost always the unchanged defaults, not a faulty unit. Set the six numbers, confirm one clean synchronization to 100% on a full charge, and the monitor becomes the most trustworthy gauge in the system.
Where does the Victron shunt go in the wiring?
The shunt sits in the battery negative line. The battery negative terminal connects to the BATTERY ONLY stud, and every other negative in the system, inverter, charger, MPPT, and loads, lands on the other stud so all current is measured.
What Peukert exponent should I use for LiFePO4?
Use 1.05 for LiFePO4. LFP loses almost no capacity at higher discharge rates, so a value near 1.00 keeps coulomb counting accurate. Lead-acid needs 1.25 or higher because it sags badly under load.
Should I buy the BMV-712 or the SmartShunt?
They share the same shunt and accuracy. Buy the BMV-712 if you want a physical head unit display you can glance at. Buy the SmartShunt if you read everything in the app or log to a dashboard and want a cheaper, smaller unit.
Why does my SoC never reach 100% on solar?
The monitor only resets to 100% when pack voltage stays above your charged voltage and current drops below tail current for the detection time. On cloudy solar days that sync never fires, so drift builds. Force a full absorption charge periodically.
Does the shunt replace my BMS?
No. The shunt reports pack-level state of charge and current accurately, but it cannot see individual cell voltages or balance cells. The BMS handles per-cell protection and balancing. Run both; they complement each other.