Important Disclaimer
BatteryStorageHQ provides educational content and estimates only. We are not certified installers, financial advisors, or electricians. Always consult with licensed professionals.
A Level 2 EV charger install at home is fundamentally a continuous-load circuit problem: a dedicated 240-volt branch circuit, sized and breakered for a load that runs at full current for hours, terminated in a safe outdoor- or garage-rated enclosure. That is the whole job in one sentence, and almost every mistake people make is a failure to respect the word “continuous.” I am a DIY pack-builder — I will top-balance cells and torque busbars on my own bench all day — but a hardwired 32-amp circuit tying into your service panel is licensed-electrician work, governed by code, and this guide is written to make you a sharp, informed client of that electrician, not to talk you into doing it yourself.
This is the install companion to the broader EV charging and home battery integration guide. Here I am only concerned with getting a Level 2 charger safely onto the wall and onto a circuit. What you feed it — grid, solar, or battery — is a separate question covered in that hub.
What “Level 2” actually means for your house
Level 2 is simply 240-volt AC charging, as opposed to Level 1’s slow 120-volt trickle from an ordinary outlet. In practice a residential Level 2 unit delivers somewhere between 7.4 kW (single-phase, 32 A) and 11 kW (three-phase, where available). That power level is what turns an overnight top-up into a few hours instead of a day and a half. The headline number people fixate on is the charger’s amperage, but the number that governs the install is the continuous current, because the National Electrical Code (and equivalent codes elsewhere) treats EV charging as a continuous load.
The continuous-load rule is the single most important concept here. Under the NEC, a circuit serving a continuous load must be sized to 125 percent of that load. So a 32 A charger is not wired on a 32 A circuit — it requires a circuit and breaker rated for 40 A (32 × 1.25), with conductors sized to match. Get this wrong and the breaker nuisance-trips at best and the conductors run hot at worst. This is exactly the kind of margin I obsess over on the DC side of my own system, where I fuse for continuous draw, not for the brief peak.
Hardwired versus plug-in (NEMA 14-50)
You have two broad install paths, and the choice matters more than people expect.
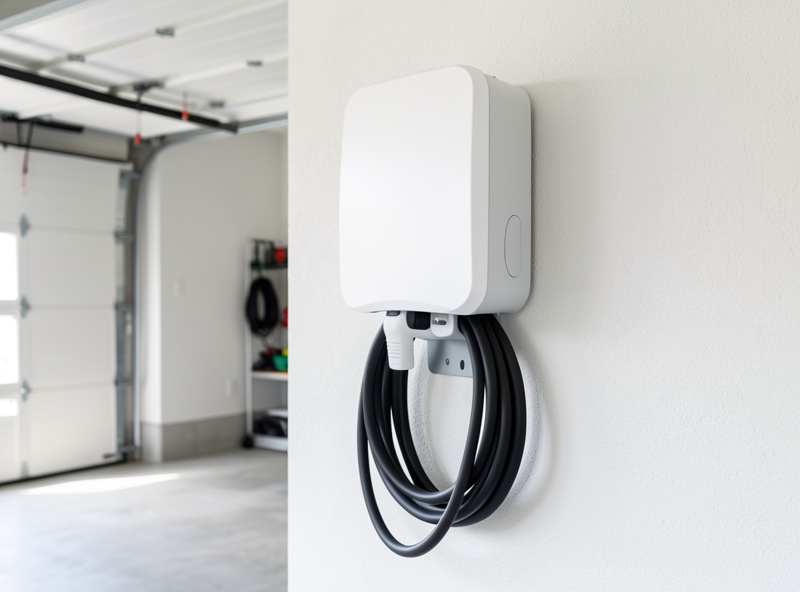
Hardwired means the charger’s conductors land directly in the unit, no plug. This is the cleaner, more robust option for a permanently mounted home charger, it is required for the highest power levels, and it is generally better outdoors because there is no receptacle to weather. The downside is that swapping the unit later means an electrician, not a yank-and-replace.
Plug-in means the charger ends in a NEMA 14-50 plug (the common 240 V / 50 A receptacle) so you can unplug and replace it. Convenient, but a 14-50 receptacle introduces its own failure mode: a cheap receptacle on a high, sustained current can overheat at the contacts. If you go plug-in, the receptacle itself should be a heavy-duty, properly rated industrial part installed by an electrician — not a bargain-bin outlet. A continuous 40-amp draw will find a weak connection and turn it into a hot spot, and that is a genuine fire concern, not a theoretical one.
My bias, for a fixed home charger, is hardwired. The same reason I hardwire and torque the busbars on my battery bank rather than relying on push connectors applies here: every high-current connection is a potential point of resistance and heat, and the fewer of them in the path, the better I sleep.
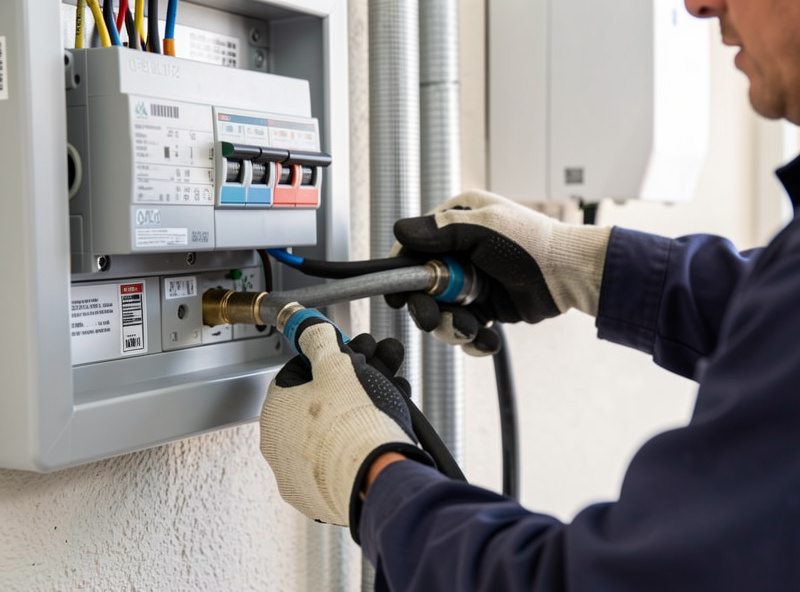
The pre-install reality check: does your panel have room?
Before anyone mounts anything, the question is whether your electrical service can actually carry a new continuous 40-amp circuit. This is a load calculation an electrician performs against your panel’s capacity and your existing loads. A modern home with a 200-amp service and modest existing demand usually absorbs an EV circuit without drama. An older home with a 100-amp service, electric heat, and an electric range may not — and that is where load management enters.
Load-management devices and dynamic load balancing let a charger throttle itself down when the rest of the house is drawing heavily, so you can add EV charging without a full service upgrade. Many smart chargers include this, and some integrate with a current-transformer clamp on your main feed. It is genuinely clever, and it is also exactly the kind of dynamic-load logic I run on the battery side of my system — the same instinct of letting a controller share a fixed capacity intelligently rather than over-building the supply. Sizing the charger to what your battery and inverter can actually sustain is a related question I cover in the integration guide.
Outdoor, garage, and weatherproofing considerations
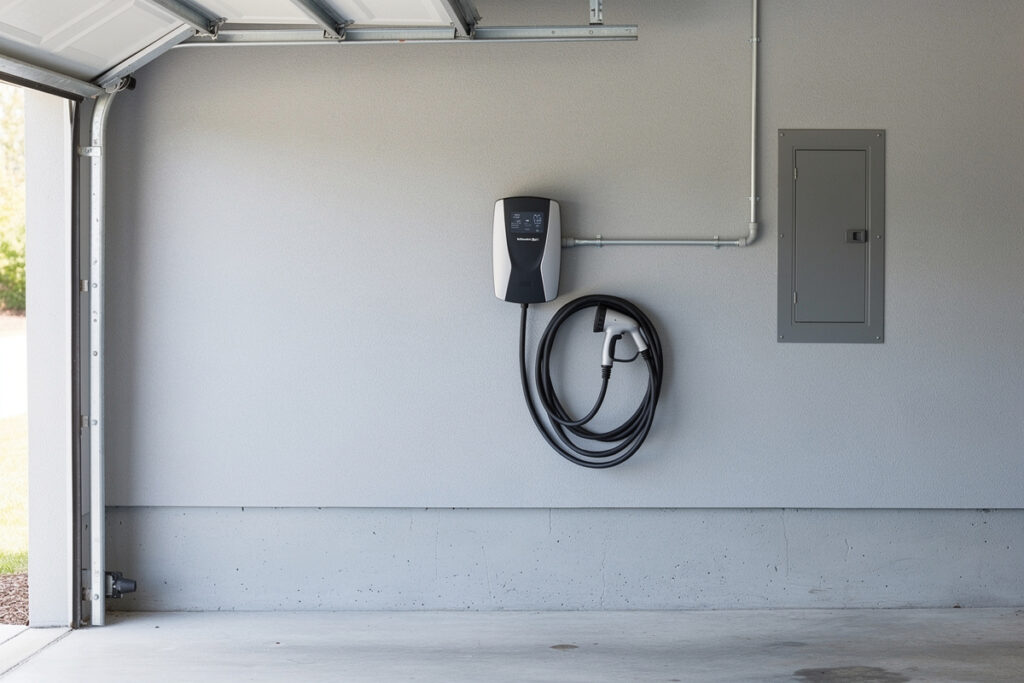
Where the unit lives changes the requirements. An outdoor install needs a unit and any receptacle rated for outdoor use, weather-sealed, and ideally shaded from direct sun and driving rain. A garage install is more forgiving but still wants the unit mounted at a sensible height, with the cable managed so it is not dragged across the floor or pinched in a door. Mounting height and cable reach sound trivial until you are standing in the cold trying to reach a port on the far side of the car — plan the geometry for how you actually park.
Ground-fault protection is built into compliant EVSE units, which is part of why you buy a real charger rather than improvising. Do not defeat or work around it. And the disconnect requirements — whether a separate disconnecting means is needed within sight of the unit — are jurisdiction-specific, which is one more reason this is an electrician’s call against your local code, not a generic internet checklist.
Connector standard is the other thing to settle before you buy. The plug on the end of the cable has to match your car, and the regional landscape is in transition — the connector that ships on cars in your market this year may not be the one that was standard three years ago. The safe move is to confirm the connector against the specific vehicle you own or are about to own, and to favour a charger that the manufacturer supports with the right cable rather than relying on an adapter as a permanent solution. Adapters are a fine bridge for occasional public charging; for the unit bolted to your wall and used every night, native compatibility is what you want.
What I would buy, and where the money matters
The charger itself is the one piece you genuinely choose as a consumer, and it is worth getting a smart, well-built Level 2 unit with dynamic load management and the connector standard your region and car use. The intelligence in the charger is what unlocks time-of-use and solar-aware charging later, so a dumb unit is a false economy.
If you are shopping, a smart hardwired Level 2 EV charger is the core purchase, and pairing the install with a quality heavy-duty NEMA 14-50 receptacle matters if you choose the plug-in route — the receptacle is not the place to save money on a continuous-current circuit. As an Amazon Associate I earn from qualifying purchases.
What I would not do is buy the cheapest unit, wire it plug-in to a bargain receptacle, and skip the load calculation. Every part of that sentence is a corner that, on a continuous 40-amp circuit, can turn into heat. The whole-system view — how this charger relates to your inverter’s continuous output and your bank’s capacity — lives in the EV charging integration guide, and the general principle of building margin into a system is the same one I apply to a battery storage sizing calculation.
Frequently asked questions
Can I install a Level 2 EV charger myself?
A hardwired Level 2 charger ties into your service panel on a dedicated 240-volt continuous-load circuit, which is licensed-electrician work in nearly every jurisdiction and is governed by electrical code. Even where a plug-in unit is permitted on an existing receptacle, the circuit, breaker, and receptacle must be correctly sized and installed for continuous current. Treat this as a job to specify well and hand to a qualified electrician, not a DIY project.
What size breaker does a 32 A Level 2 charger need?
Because EV charging is a continuous load, the NEC requires the circuit to be sized to 125 percent of the charger’s current. A 32 A charger therefore needs a 40 A circuit and breaker (32 multiplied by 1.25), with conductors sized to match. This is why you never wire a 32 A charger on a 32 A breaker. Your electrician confirms the exact conductor size against length and local code.
Is hardwired or plug-in better for a home charger?
Hardwired is generally the better choice for a permanently mounted home charger: it is more robust, better outdoors, and required at the highest power levels. Plug-in (NEMA 14-50) adds the convenience of swapping the unit but introduces a receptacle that can overheat at the contacts under sustained high current if it is a cheap part. If you go plug-in, use a heavy-duty industrial-grade receptacle installed by an electrician.
Do I need to upgrade my electrical panel for an EV charger?
Not always. An electrician performs a load calculation against your service capacity and existing loads. Many homes with a 200 A service absorb an EV circuit without an upgrade. Older or heavily loaded panels may need one, but load-management devices and dynamic load balancing can often let a charger throttle down during peak household demand, avoiding a full service upgrade. The load calculation decides which path applies to your home.