Important Disclaimer
BatteryStorageHQ provides educational content and estimates only. We are not certified installers, financial advisors, or electricians. Always consult with licensed professionals.
The most expensive cold-weather failures I have seen had nothing to do with the cells or the chemistry. They were a bank in an unheated garage that quietly lost capacity over a winter because nobody addressed the temperature; an inverter that sulked and shut down because condensation had been dripping on its board for weeks; a string of connectors packed solid with ice on the one morning the sun finally came out. You can get every electrical decision right and a careless physical install will still let you down at minus fifteen. Winterizing the system — where it lives, how it is insulated, how it handles moisture and snow — is the unglamorous half of cold-climate storage, and it is where most of the real-world trouble actually happens.
This is the install half of the winter problem, the physical counterpart to the BMS settings and cold-weather chemistry I cover elsewhere. It sits inside the broader winter solar storage system. The single biggest decision is the one everyone underthinks: where does the bank live?
The siting decision: heated, garage, or outdoor
Almost everything downstream flows from where the bank sits, because that determines whether it can freeze.
A heated indoor space is the easy mode. If the bank lives somewhere that stays above freezing — a utility room, a basement, a heated workshop — the charge-temperature problem largely disappears. The cells stay in their happy window, the BMS cutoff rarely has to act, and you do not need a heating pad. The trade-offs are space, the (small but real) consideration of putting a large energy store inside the living envelope, and ensuring decent ventilation. For most small residential builds, indoor-and-heated is the right answer if you have the room, and I steer people toward it.
An unheated garage or outbuilding is the common middle ground, and the one that needs real thought. The bank will track ambient and can absolutely go below freezing in a cold snap. That means you must either heat the cells (a thermostatic heating pad, sized to the bank, drawing the bank’s own trickle) or accept that you lose winter charging whenever it freezes. Insulating the enclosure helps the pad do less work, but insulation alone adds no heat — it only slows the loss. This is where the heating-pad decision really lives: it is a siting decision wearing a hardware costume.
A fully outdoor enclosure is the hardest case and the one I would avoid unless there is genuinely no alternative. You are now fighting deep cold, freeze-thaw cycling, condensation, snow, and weather ingress all at once. It can be done — a well-built, insulated, heated, weatherproof enclosure with proper ventilation and drainage — but it is the most engineering for the least margin. If you must, build it like it matters, because outdoors it does.
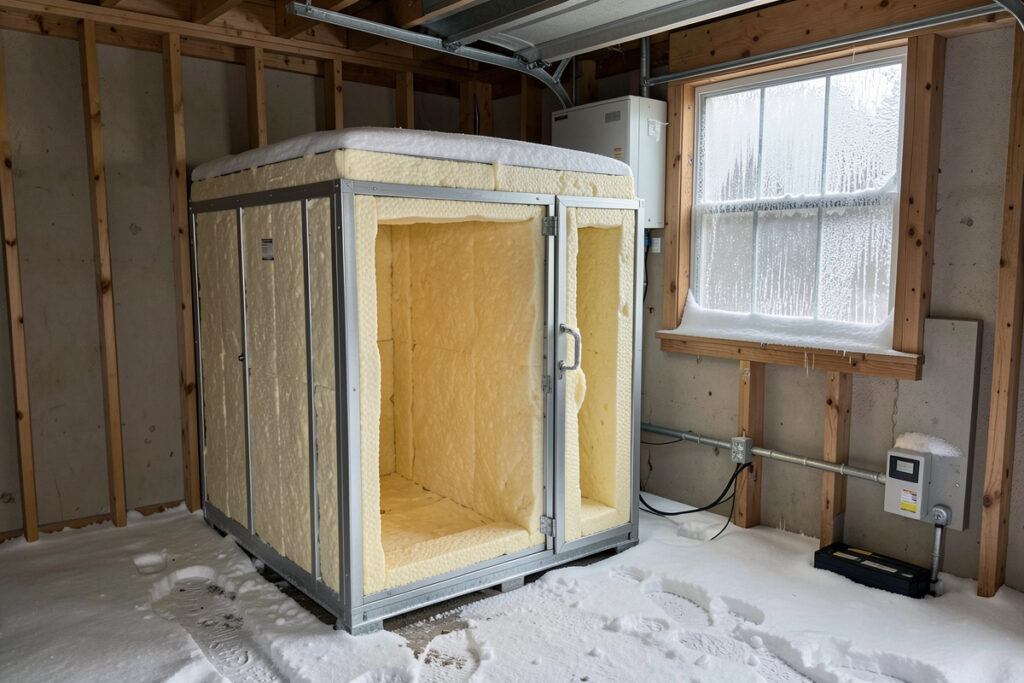
Insulation that helps and insulation that hurts
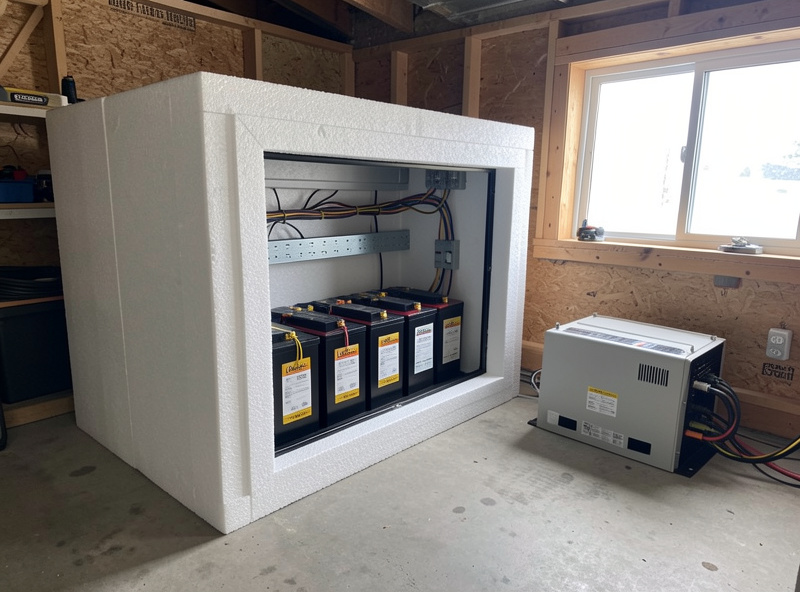
Insulation is your friend with one important caveat. Around a bank that is heated — by a pad, or by living in a semi-warm space — insulation keeps that warmth in and lets a small heat source do a lot. That is exactly what you want: a modestly insulated enclosure around a heated bank holds the cells in the charge window on a fraction of the energy a bare bank would need.
The caveat is the inverter and any other heat-producing electronics. Those want airflow, not a sealed insulated box. Wrap an inverter in insulation and you trap its own waste heat and choke the cooling it needs under load. So the rule is: insulate the things you are keeping warm (the cells), ventilate the things that make their own heat (the inverter), and never confuse the two. A common rookie build puts everything in one tightly sealed insulated box and then wonders why the inverter overheats in use and the enclosure sweats.
Condensation and freeze-thaw: the quiet destroyers
More cold installs are killed by water than by cold. The mechanism is condensation. An enclosure that warms during the day — sun on it, the inverter running, a heating pad cycling — and chills at night breathes moist air in as it cools and condenses that moisture on the coldest surfaces: busbars, terminals, the inverter’s internals. Over weeks that means corrosion on connections that should stay clean and tight, and moisture where electronics least want it.
The fix is not a perfectly sealed box — a sealed box sweats worst, because the moisture that gets in cannot leave. The fix is to either keep the enclosure consistently above the dew point (a little steady heat does this) or give it controlled ventilation so humid air can escape rather than condense. Drainage matters too: any enclosure that can collect water needs a way for it to leave at the bottom, not pool around terminals. I would rather a slightly breathing enclosure that stays dry than a hermetic one that drips.
Snow, connectors, and the array side
On the production side, snow on the panels is a total loss until it clears. A steep winter tilt sheds most of it; for the rest, mounting the array where you can physically reach and sweep it beats a high, inaccessible roof you will watch sit white for days. I have stood in the dark sweeping panels with a soft broom more than once, and I would rather that than a flat array I cannot reach.
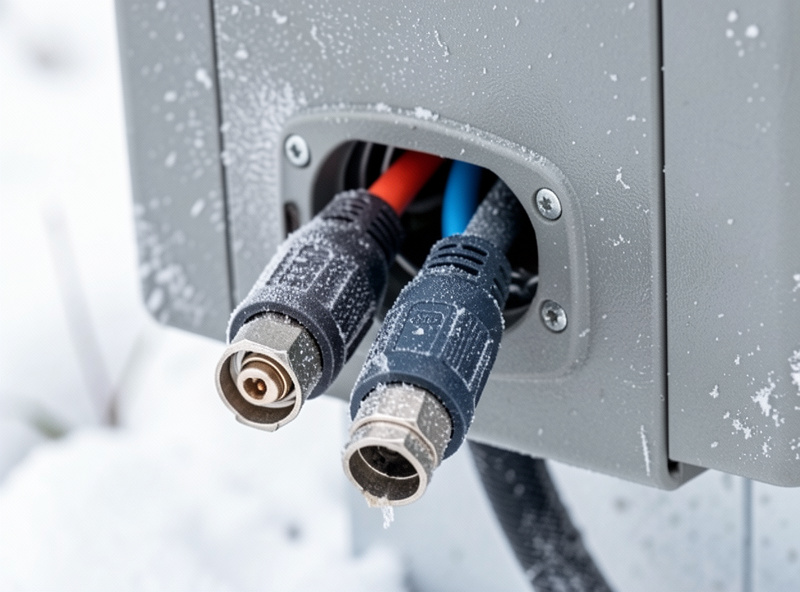
Connectors and cabling want attention too. Outdoor DC connectors should be the proper weatherproof type, seated fully and facing down or shielded so meltwater and snow do not sit in them and freeze. A connector packed with ice is an open circuit at exactly the wrong moment. Cable entries into enclosures should be sealed against driven snow but — see the condensation point — not so hermetically that the box cannot breathe. And give the array side a walk after the first real snowfall: the failure you find in November is a chore; the one you find in January is an emergency.
The inverter through winter
The inverter tolerates cold better than the bank but still has preferences. It wants to live somewhere dry, with the clearance its manual specifies for cooling, and somewhere the temperature does not swing wildly enough to drive the condensation cycle across its board. Its surge headroom — the spec that actually matters when a motor load like a well pump or the workshop welder fires — is unaffected by cold, which is one less thing to worry about. But its display and control electronics still prefer not to be iced, and a unit mounted in a damp, freezing corner will give you grief that a well-sited one never does.
Put all of this together and the pattern is simple: decide where the bank lives first, then insulate what you are warming, ventilate what makes heat, keep water moving away from connections, and stay on top of snow. None of it is exotic. All of it is the difference between a system that shrugs off a Nordic winter and one that nickel-and-dimes you with failures that have nothing to do with the batteries themselves. Get the install right and the clever electrical design finally gets to do its job.
An autumn checklist before the first hard frost
I run the same walk-through every autumn, and it has caught problems every single year — a sensor that had drifted off a cell, a connector starting to corrode, an enclosure vent blocked by debris. It takes an hour and it is the cheapest insurance in the whole system.
Start at the bank: confirm the cells are sited somewhere you have actually accounted for freezing, the heating pad (if fitted) powers up and its thermostat trips at the right temperature, and the BMS temperature sensor is still bonded to the coldest cell and reading sensibly. Check that the enclosure insulation is intact and that nothing flammable has crept in next to a heat source. Then move to moisture: look for any sign of last winter’s condensation — corrosion blooms on busbars or terminals are the tell — and confirm your ventilation or steady-heat strategy is in place, plus that any drainage path is clear.
Move to the inverter: clear its cooling clearances, check it is dry and not sitting where it will be rained on by condensation, and make sure its vents are not blocked. Finally, walk the array side: tighten and inspect outdoor connectors, confirm they face down or are shielded against meltwater, check the mount is sound after summer’s thermal cycling, and if your tilt is seasonally adjustable, set it to the steep winter angle now rather than in a blizzard. None of these is hard; skipping them is how a small autumn chore becomes a January emergency.
The winterizing kit I actually keep around
None of this needs exotic gear, but a few items make the job far easier and the install far more reliable. For an unheated bank, a thermostatic heating pad is the heart of it. A small hygrometer or temperature/humidity sensor in the enclosure tells you whether your condensation strategy is actually working rather than leaving you to guess. And insulation board to line a bank enclosure lets a tiny heat source hold the cells in the charge window. These are the things I reach for when winterizing.
As an Amazon Associate I earn from qualifying purchases. These are the parts I would genuinely use; they cost you nothing extra.
- Thermostatic battery heating pad — keeps the cells above freezing in an unheated garage or enclosure.
- Temperature/humidity sensor — confirms the enclosure stays above the dew point so condensation never starts.
- Rigid foam insulation board — line the bank enclosure so a small heat source does most of the work.
Spend a weekend on the install in autumn and you buy yourself a winter of not thinking about it. That is the trade I make every year, and it is a good one.