Important Disclaimer
BatteryStorageHQ provides educational content and estimates only. We are not certified installers, financial advisors, or electricians. Always consult with licensed professionals.
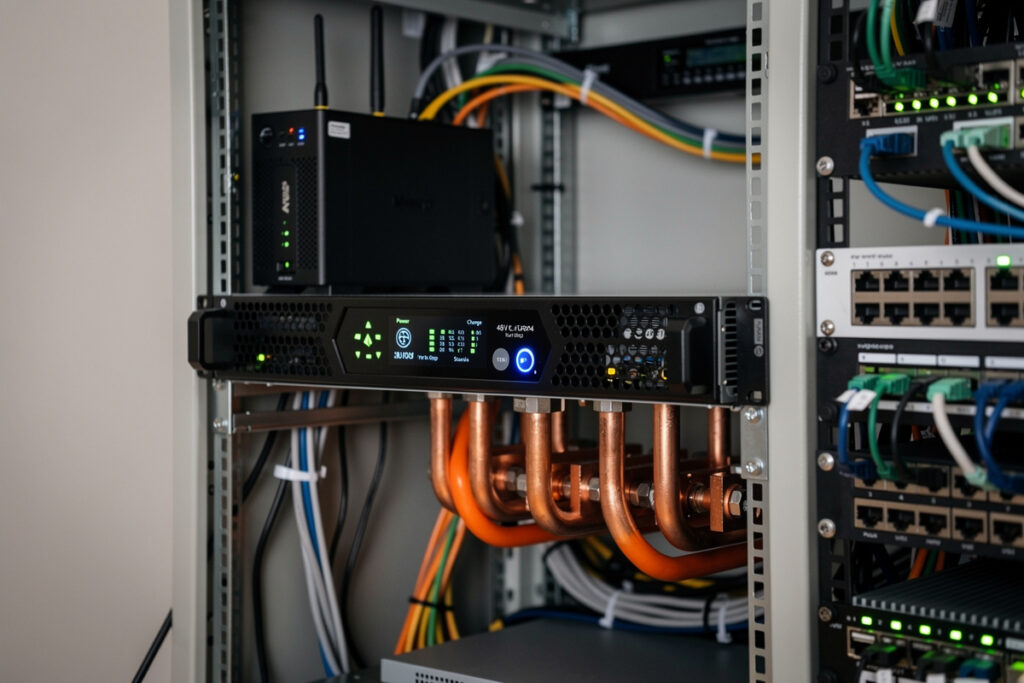
A 48V LiFePO4 server-rack battery powering a homelab eliminates the cascade of inefficient power conversions that a traditional UPS-plus-AC setup creates: instead of grid AC → UPS battery (DC) → inverter back to AC → switching power supply (AC to 12V or 48V DC) inside each network device, the LiFePO4 bank feeds 48V DC directly to PoE switches and 12V DC via a small step-down to routers, NASes, and a Raspberry Pi cluster. The round-trip efficiency goes from roughly 78% to 96%.
This guide walks through the bus-voltage decision (48V vs 24V vs 12V), DC-DC converter sizing for mixed-voltage gear, the BMS integration that lets your homelab automatically reduce load when battery state-of-charge drops, and the rack-layout choices that make 48V DC distribution safer than residential AC at the same power level.
Why 48V DC Native Power Wins for Homelabs
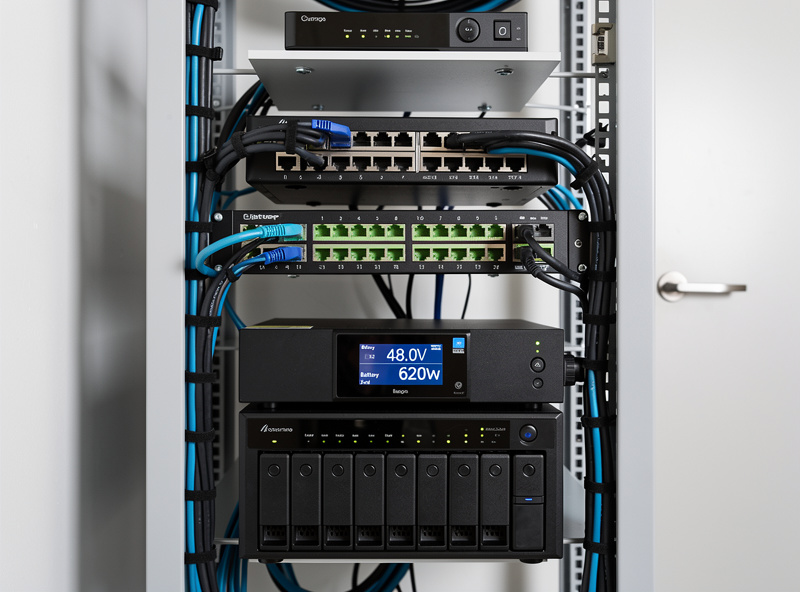
A typical small homelab — pfSense router, 24-port managed switch, NAS, two mini-PCs running services — pulls 80-180 W continuous. That power passes through 4-6 different power supplies in a standard AC setup, each losing 10-15% to switching inefficiency and adding heat. A 48V DC native architecture skips those conversions:
- PoE switches accept 48-56V DC directly via redundant PSU rear inputs. Most enterprise switches (UniFi, MikroTik, Edgecore, MicroTik CRS series) support DC input at the same connector that takes AC.
- Network devices and NASes at 12V step down from 48V via a small efficient DC-DC buck converter — about 96% efficient versus 78% for AC switching supplies.
- Raspberry Pi clusters at 5V step down from 12V (or directly from 48V via a 48V-to-5V converter), staying in the DC domain end-to-end.
The homelab side of this design — what to build first, which router fits the 48V topology, and how to integrate it with pfSense or OPNsense — is covered in our partner site’s complete pfSense configuration guide, which walks through the network-side architecture decisions that pair with this DC power layer.
Bus Voltage: 48V vs 24V vs 12V
Three voltages are commonly used for DC homelab power. The trade-offs:
48V (recommended for any homelab over 100W)
Lower current at any given wattage means thinner wires, smaller breakers, and lower I²R losses. A 200 W load at 48V draws 4.2 A — handled by 14 AWG wire and a $5 breaker. Same load at 12V draws 16.7 A — needs 8 AWG wire and a $25 breaker. PoE++ standard (IEEE 802.3bt) operates at 55V, which 48V LiFePO4 systems hit naturally during charge.
24V (acceptable for small lab, simpler converters)
Twice the current of 48V at the same wattage. Most networking gear that takes “DC input” rates at 24-56V, so 24V works. DC-DC converters are slightly cheaper and more common at 24V than 48V. The downside: most server-rack LiFePO4 batteries are 48V; 24V means 4-cell stacks instead of standard 16-cell server-rack form factors.
12V (only for very small loads under 50W)
Standard for boats, RVs, and individual device power supplies. At any meaningful homelab load, current draw becomes impractical (a 100W load at 12V is 8.3 A — fine for short runs, problematic for distribution). Use 12V only if your entire load is sub-50W and you’re using existing 12V components from another project.
Battery Choice: Pre-Built Server Rack vs DIY 16S Pack
| Option | Capacity | Approx Cost (per kWh) | BMS | Communication | Best for |
|---|---|---|---|---|---|
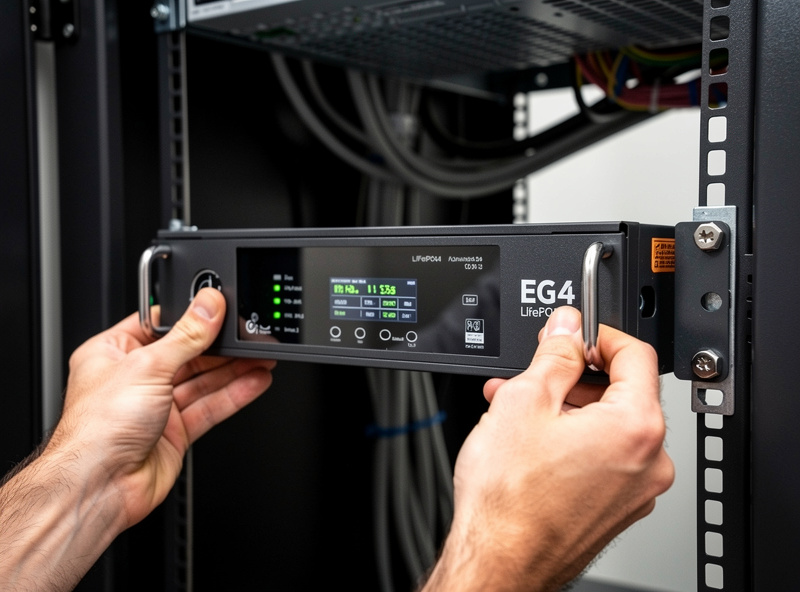
| EG4 LL-S 48V 100Ah | 5.12 kWh | $280 | JBD/Daly built-in | RS485, CAN bus to inverters | Standard recommendation |
| SOK 48V 100Ah server rack | 5.12 kWh | $320 | Premium BMS | RS485, Bluetooth app | Higher quality, longer warranty |
| BigBattery EG4 24V 200Ah | 5.12 kWh | $310 | Active balancing | RS485 | 24V workflows |
| Pytes V5 48V 100Ah | 5.12 kWh | $310 | Communicates with major hybrid inverters | CAN bus to most inverter brands | If pairing with Sol-Ark, EG4, or Victron |
| DIY 16S 280Ah Grade A cells | 14.3 kWh | $180-220 | Aftermarket JBD/Daly/Overkill | Whatever BMS supports | Maximum capacity per dollar |
| DIY 16S 100Ah cells | 5.12 kWh | $200-260 | Aftermarket | Whatever BMS supports | Custom form factors |
For most homelabs, a single 5 kWh server-rack battery handles 50+ hours of runtime at typical 80-100W draw. A second battery in parallel doubles capacity and adds redundancy without added complexity (parallel BMSes share load automatically through balancing). For deeper background on the chemistry choice itself and what BMS settings actually matter, see the battery chemistry home storage guide, the LiFePO4 vs NMC for home storage, and the DIY LiFePO4 battery bank build guide.
DC-DC Converter Sizing
The buck converter from 48V down to 12V (or 24V) is the bridge between battery and network gear. Sizing requires understanding both the steady-state load and the inrush.
- Sum your 12V loads. A typical small homelab: pfSense mini-PC (15W), NAS at idle (15W), 24-port managed switch (40W) — total 70W steady-state. PoE devices (cameras, APs, IP phones) get powered separately via PoE switches at 48V native.
- Add 50% headroom. 70W × 1.5 = 105W. Round up to a 150W or 200W converter — Meanwell DDR series, Genuine Mornsun, or PowerStream LDC are common choices.
- Choose 24V or 12V output. Most small homelab gear takes 12V input; some routers and switches accept 24V. Match the converter output to the bulk of your gear.
- Plan for inrush. Switching power supplies upstream of network gear sometimes have 3-5x steady-state inrush at startup. A 150W converter handles a 70W steady load with margin for inrush; a 100W converter would trip on inrush.
The Meanwell DDR-240C-12 (240W, 48V to 12V isolated) at $90 is the standard recommendation for small homelabs. For larger labs (PoE switches at 50-150W each, multiple servers), look at the Meanwell SHP series or industrial open-frame converters.
BMS Integration with the Homelab
The single biggest reliability win after the basic DC architecture is BMS-to-homelab communication. Most server-rack LiFePO4 batteries expose RS485 (Modbus) or CAN bus that reports state-of-charge, cell voltages, current, and temperature. Three high-value integrations:
- State-of-charge to Home Assistant or Grafana. A simple USB-RS485 dongle plus an inexpensive Modbus reader script publishes real-time SoC to MQTT. Visible in your dashboard alongside CPU, network, and power metrics.
- Graceful shutdown trigger. When SoC drops below 20%, automation triggers shutdown of non-essential VMs and the NAS, leaving routing and core services running on the remaining capacity.
- Cell-balance monitoring. Voltage delta between cells over 50 mV indicates a balancing problem. Alert before a dead cell takes the bank offline.
The Overkill Solar BMS app, the JBD BMS Bluetooth app, and the Pytes RS485 protocol all publish to MQTT with about 50 lines of Python. The pfSense or OPNsense router can also act as the integration point if you don’t want a separate Home Assistant instance.
Rack Layout and Safety
48V DC distribution at homelab power levels is safer than residential AC at the same power because 48V is below the threshold for arc-flash hazard and electrocution risk. But it has its own failure modes:
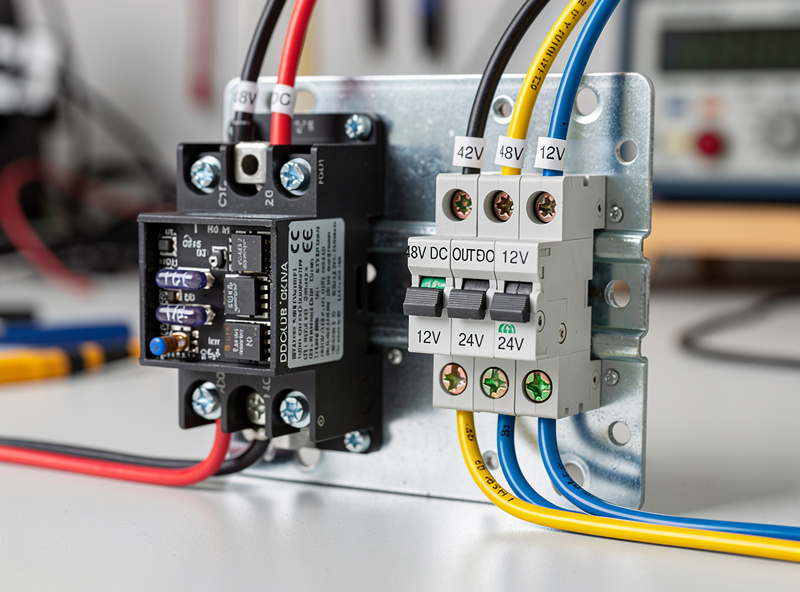
- Short-circuit current is enormous. A 100Ah LiFePO4 cell can deliver 200-500A into a short. Always install a Class T fuse or a 100-200A DC breaker on the main bus output, within 18 inches of the battery terminals.
- Reverse polarity is fatal. Network gear with reversed polarity dies instantly. Use polarized Anderson Powerpole or XT60 connectors for every connection.
- DC arcs don’t self-extinguish. AC breakers rely on the zero-crossing every 8.3 ms to interrupt arcs. DC breakers must be DC-rated (look for “DC” in spec sheet) — using an AC breaker on a DC circuit won’t trip cleanly under fault.
- Wire sizing matters more than at AC. A 200W load at 48V is 4.2A — easy. But the same load at 12V is 16.7A, requiring 12 AWG minimum and tight runs to avoid voltage drop.
What to Build First
- Day 1: Buy one EG4 LL-S 48V 100Ah server-rack battery, one Meanwell DDR-240C-12 buck converter, one 100A Class T fuse + holder, and one 60-100A DC breaker. Total roughly $1,750.
- Week 1: Wire the battery → fuse → breaker → buck converter → 12V distribution panel. Test under load with a single non-critical device.
- Week 2: Migrate router, NAS, and managed switch to DC power. Verify steady-state draw matches expectations.
- Week 3: Add BMS-to-Home Assistant integration via RS485 dongle and Modbus reader script. Set graceful-shutdown triggers.
- Month 2+: Expand with additional batteries in parallel, add solar charging via MPPT controller, integrate with full whole-home solar setup.
For the upstream solar charging that makes this whole system off-grid-capable, the broader battery bank and inverter selection is covered in the DIY LiFePO4 build guide. For homelab-specific UPS sizing that doesn’t require the full DC migration, see the SOK 48V battery review and the Grade A vs Grade B cell comparison for cell sourcing decisions.
For the deeper homelab networking side — pfSense or OPNsense configuration, switch selection, VLAN architecture — see the pfSense firewall rules guide and the best mini PC for pfSense roundup on our partner site.
For the underlying engineering references, NFPA 70 (the National Electrical Code) covers the safety requirements applicable to residential battery systems. The EnergyStar data center equipment portal publishes efficiency benchmarks for 48V DC vs AC distribution that informed the conversion-loss numbers in this guide.
Frequently Asked Questions
Is a 48V DC homelab actually more efficient than AC plus UPS?
Yes — about 96 percent end-to-end versus 78 percent for traditional grid AC plus UPS plus per-device switching power supplies. The savings come from skipping multiple AC-DC and DC-AC conversions. Over a year, a 100W homelab saves roughly 160 kWh, which is meaningful on solar-powered systems.
What battery should I buy for a small homelab?
A single EG4 LL-S 48V 100Ah server-rack battery (5.12 kWh, around $1,400) is the standard recommendation. It runs an 80-100W homelab for 50+ hours, has a built-in BMS, communicates over RS485 for monitoring, and uses a standard 19-inch rack mount. SOK 48V 100Ah at slightly higher cost is the alternative for longer warranty and premium BMS.
Can I run my router and NAS directly off the battery?
Yes, via a 48V-to-12V DC-DC buck converter. The Meanwell DDR-240C-12 ($90, 240W) handles a small homelab cleanly. Direct DC operation eliminates the per-device AC adapter and avoids the inverter losses that a traditional UPS introduces. PoE switches accept 48V DC directly without a converter.
Are 48V DC systems dangerous to work on?
Less dangerous than residential AC at the same power. 48V is below the electrocution and arc-flash thresholds for shock injury. Short-circuit current from LiFePO4 cells is the main hazard — a Class T fuse within 18 inches of the battery is mandatory. Always use DC-rated breakers, not AC breakers, on DC circuits.
Do I need to learn Modbus to integrate the BMS?
For basic monitoring, no — most server-rack BMSes ship with Bluetooth apps that show state-of-charge directly. For advanced integration with Home Assistant or pfSense (graceful shutdown triggers, dashboards, alerting), a USB-to-RS485 dongle plus a 50-line Python script reads Modbus registers and publishes to MQTT. The protocol documentation is published by Pytes, EG4, and Overkill Solar.
What happens if the BMS fails or disconnects?
Most server-rack BMSes default to disconnect (open-circuit) when they detect any fault. The result is loss of power to the homelab — exactly the failure mode a UPS exists to prevent. For redundancy, parallel two batteries with separate BMSes; if one disconnects, the other carries load. Some installations also wire a small grid-power transfer relay as backup.
Can I use this with solar panels for off-grid homelab?
Yes — add an MPPT solar charge controller (Victron SmartSolar 100/30 or Outback FM60) between solar panels and the LiFePO4 bank. Pair with a small inverter for any AC loads (printer, occasional desktop) and you have a fully off-grid homelab. Charging at typical solar production handles homelab daily energy needs with as little as 600-1000W of panel.