
Important Disclaimer
BatteryStorageHQ provides educational content and estimates only. We are not certified installers, financial advisors, or electricians. Always consult with licensed professionals.
Battery storage maintenance and troubleshooting is mostly about three things: holding cells in balance, keeping every charge inside the LiFePO4 safe window, and catching a drifting or weak cell before it drags the whole pack down. Do those well and a quality 16S LFP bank will give you 6,000+ cycles. Skip them and you can cripple a brand-new bank in a single winter.
I run a 16S LiFePO4 bank built from grade-A EVE LF280K prismatics — top-balanced on the bench, compression-fixtured, watched per-cell through Home Assistant. Over the years I have also kept an aging reference bank of older CALB and grade-B pulls on the same bench precisely so I can see what neglect and time actually look like. This guide is the maintenance and troubleshooting playbook I run on my own system, broken into the parts that matter, with a deeper guide for each one.
What “Maintenance” Actually Means for a LiFePO4 Bank
LiFePO4 maintenance is not lead-acid maintenance. There is no electrolyte to top up, no equalization charge to force, no monthly specific-gravity ritual. A healthy LFP bank wants to be left alone inside a narrow set of conditions — and almost all real “maintenance” is verifying those conditions still hold. The single biggest mistake I see is people applying lead-acid habits (deliberate deep discharges, high float voltages, equalization) to lithium, where every one of those does harm.
The work splits into two halves. Preventive maintenance keeps the bank in its happy zone: correct charge profile, cells in balance, sane depth of discharge, and a storage state-of-charge when the bank sits idle. Troubleshooting is what you do when the monitoring tells you something has drifted — a lagging cell, a capacity that no longer matches nameplate, a BMS that keeps tripping on charge. Everything below is one of those two halves, and each links to a full standalone guide.
The Longevity Levers: Cycle Life, Depth of Discharge, and Charge Profile
The biggest lever on how long your bank lasts is not the brand of cell — it is how deeply you cycle it and how hard you charge it. LFP cycle life roughly doubles when you go from 100% depth of discharge to about 80%, and quality cells are rated for 6,000+ cycles at that 80% figure. Charging to a lower absorption voltage and skipping the long hold at the top buys you even more.
In practice I cap usable depth of discharge on my bank to roughly 80–90% and I never park it at a permanent 100% state of charge. The tips for extending LiFePO4 cycle life get into the specific charge-voltage and rest-state choices that move the needle most, and the dedicated depth of discharge guide walks through the cycle-life-vs-DoD curve and how to set your low-voltage cutoff so the BMS protects the pack instead of fighting it. If you want the underlying chemistry math, our older breakdown of battery cycle life versus DOD shows the chart that determines whole-system lifespan.
Charge profile is the other half. LFP wants an absorption voltage that gets the pack full without dwelling at the very top, and a float (if you float at all) low enough that it is not constantly holding cells at maximum. For my 16S bank that means an absorption around 56.0–56.4 V and a float near 54.0 V — full, but not parked at the ceiling. Getting this right is the cheapest longevity upgrade there is, because it costs nothing but the time to set it once.
The Monitoring Layer: How You Catch Problems Before They Bite
You cannot maintain what you cannot see. A pack monitored only at the bank-level terminals will look perfectly healthy right up until one cell hits 3.65 V on charge and the BMS slams the door — and you will have no idea why. Per-cell visibility is the single best diagnostic investment you can make, and on a DIY bank it is essentially free because a decent BMS already measures every cell.
My layer stack is the BMS (a JK active-balancer board on the main bank) for per-cell voltage and balancing, a shunt-based monitor for true amp-hours in and out, and Home Assistant pulling both so I can see cell spread, state of charge, and daily throughput on one dashboard — the same rule engine that watches the rest of the workshop. The battery monitoring guide covers how those layers fit together, and the Victron SmartShunt monitor guide covers the coulomb-counting side. If you are still deciding what a BMS even does for you, start with understanding the BMS.
The number I watch most is cell spread — the millivolt gap between my highest and lowest cell. At rest a healthy balanced pack sits within a few millivolts; the gap widens at the top and bottom of the charge curve, which is normal. A spread that keeps growing cycle over cycle is the earliest warning of a drifting or weak cell, long before any fault trips.
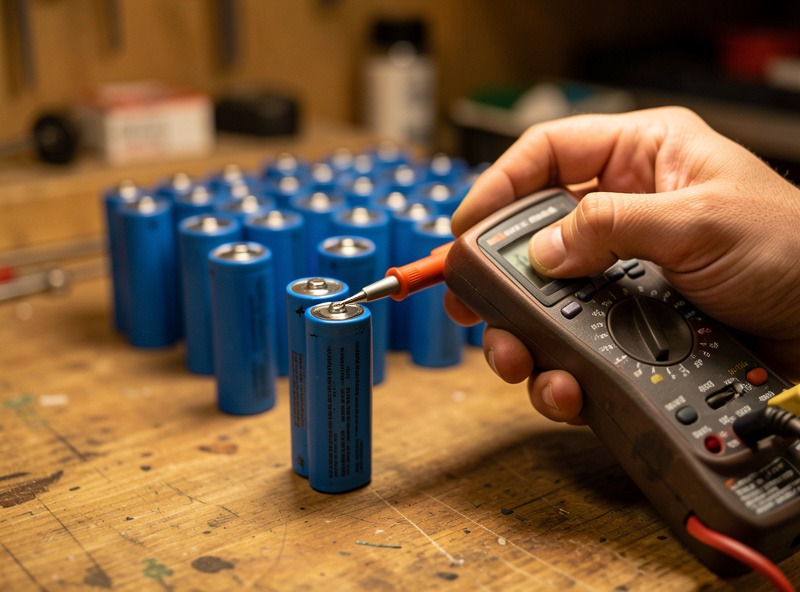
Capacity and Health Testing: Knowing What You Actually Have
Nameplate capacity is a starting claim, not a measurement. The only way to know your bank’s real capacity is to test it — discharge a known load through a shunt and count the amp-hours that actually come out. I do this on a new bank at commissioning to establish a baseline, then roughly once a year to track fade. A grade-A 280 Ah cell should test at or slightly above its rating when new; watching that number drift downward over years is how you separate normal aging from a developing fault.
The full method — load choice, the role of the shunt, how to read the result against nameplate, and why a single weak cell shows up as a whole-bank capacity loss — is in the battery bank capacity test guide. The key idea: capacity testing measures the weakest cell, because the BMS stops the discharge when the first cell hits its floor. That is exactly why a capacity test is also your first weak-cell detector.
Cell-Level Troubleshooting: Drift, Weak Cells, and Rebalancing
Most “the battery is broken” panics trace back to one cell behaving differently from its 15 neighbors. There are two distinct problems people lump together, and they have different fixes. Drift is when cells are individually healthy but their states of charge have wandered apart, so one races to the top on charge and trips the BMS. A weak cell is a genuinely lower-capacity or higher-resistance cell that will keep falling out of line no matter how often you rebalance it.
Telling them apart is the whole game. The guide to diagnosing weak cells walks through the voltage-under-load and rest-voltage tests that separate a tired cell from a merely unbalanced one, and the rebalancing drifted LiFePO4 cells guide covers how to bring a healthy-but-drifted pack back into line — including why a proper top-balance at build time (see top balancing LiFePO4 cells) prevents most of this in the first place. Active balancing helps maintain a balanced pack; it does not rescue a genuinely weak cell, and pretending otherwise just hides the real problem.
Reading the BMS When It Trips
A BMS that shuts off is doing its job — it is telling you a limit was reached. The trouble is that most boards report the event as a terse fault code, and a fault is a symptom, not a diagnosis. An over-voltage trip on charge almost always means one cell hit its ceiling early (a balance problem), not that the whole pack is overcharged. A low-temperature charge cutoff in November is not a fault at all — it is the board correctly refusing to plate lithium onto a freezing cell.
The BMS fault codes guide maps the common codes — over-voltage, under-voltage, over-current, over- and under-temperature, and cell-difference alarms — to what actually triggered them and what to check first. Two of those deserve their own attention in cold climates: the BMS charge-temperature cutoff that protects against below-freezing charging, and how the board behaves when a single cell difference alarm fires.
Seasonal and Storage Maintenance
Two situations need deliberate handling: a bank that lives through a northern winter, and a bank that gets stored or taken offline. Cold is the one that bites hardest — LiFePO4 must never be charged below 0 °C (32 °F), because doing so plates metallic lithium onto the anode and permanently damages the cell. Discharging cold is fine; charging cold is the rule people break. That is why a low-temperature charge cutoff is non-negotiable, and why I site and, where needed, gently heat my bank for the Swedish winter.
Storage is the quieter one. An LFP bank parked for months should sit at roughly 50–60% state of charge, somewhere cool and dry, with the charge source off so it is not held at the top for no reason. The winter storage guide covers taking a bank offline correctly and bringing it back, while the broader winterize-your-battery-system guide and LiFePO4 cold-weather performance piece cover siting and the real-world capacity hit cold delivers. For the northern-latitude solar side of the same problem, see the winter solar battery storage guide.
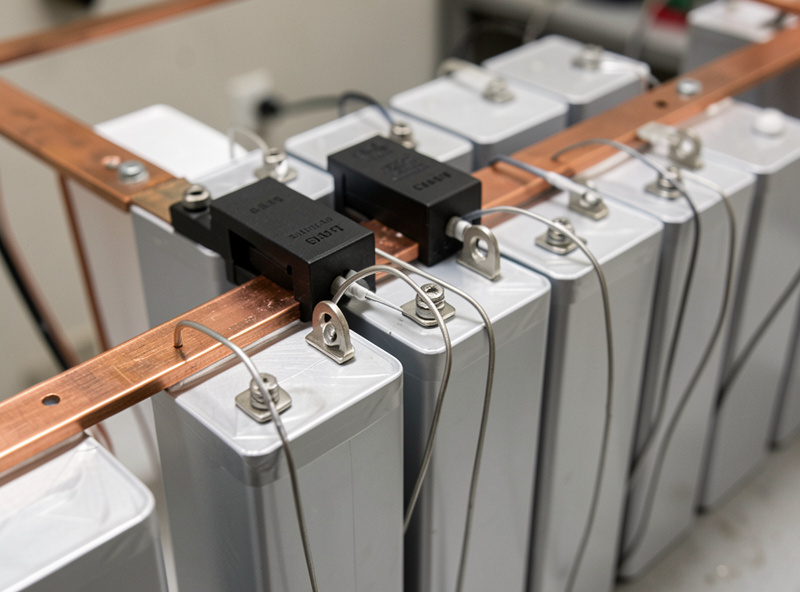
Connections and Torque: The Maintenance Task Everyone Forgets
The most overlooked maintenance item on a DIY bank is not the cells at all — it is the joints between them. A busbar or terminal that loosens even slightly develops resistance, and resistance under high current becomes heat. On a bank that feeds a hard surge load like a welder or a well pump, a loose connection can run hot enough to discolor the busbar and, in the worst case, start a fire. This is the one maintenance task where “set it and forget it” genuinely costs you.
I torque every cell terminal and busbar to the cell manufacturer’s spec at build (for the M6 terminals on my EVE cells that is in the 5–8 N·m range — always check the datasheet for your exact cells, because over-torquing strips the terminal threads as surely as under-torquing leaves them loose). Then I re-check torque after the first month of cycling, because joints settle, and once a year after that. While I am in there I look for any discoloration or heat marks on busbars and lugs — those are the visible signature of a connection that has been running hot. The full treatment of fusing, conductor sizing, and connection practice is in the home battery system wiring safety guide, and a Class-T fuse on the main bank is the non-negotiable companion to good connections.
When to Stop Troubleshooting and Replace a Cell
There is a point where chasing a problem cell stops being maintenance and becomes denial. If a cell tests genuinely low on capacity, sags hard under load compared to its neighbors, or refuses to hold a balance no matter how many cycles you give the balancer, it is a weak cell — and no amount of rebalancing fixes capacity. Active balancing shuffles charge between cells; it cannot add capacity to a cell that has lost it. Continuing to run a weak cell just means the BMS keeps cutting your usable capacity to protect that one laggard, so the whole bank performs like its weakest member.
My rule of thumb: if a single cell is dragging the pack and a capacity test confirms it has fallen meaningfully behind the others, plan to replace it (ideally with a capacity-matched cell of the same chemistry and age class) rather than nursing it. This is exactly why I keep grade matters in mind from the start — see grade A vs grade B LiFePO4 cells — because a bank built from well-matched, properly top-balanced cells almost never produces a single dramatic laggard in the first place. Diagnosis tells you which case you are in; the weak-cell diagnosis guide is where that decision gets made on data, not hope.
A Realistic Maintenance Cadence
Maintenance only happens if it is light enough to actually do. Mine is mostly passive — Home Assistant watches the bank continuously and alerts me on cell spread or a fault — with a few deliberate checkpoints through the year. The table below is the cadence I actually run, not an idealized one. The point is that a well-built LFP bank needs very little hands-on work; the value is in checking the right things at the right interval rather than fussing constantly.
| Task | Cadence | What You Check | Tool |
|---|---|---|---|
| Cell-spread review | Continuous / weekly glance | mV gap between high and low cell | BMS + Home Assistant |
| Charge-profile verify | At setup, then yearly | Absorption & float voltages correct for LFP | Inverter/charger settings |
| Capacity (health) test | At commissioning, then ~yearly | Real Ah out vs nameplate | Shunt + known load |
| Terminal & busbar torque | After first month, then yearly | Connections to spec, no heat marks | Torque wrench |
| Rebalance check | When spread grows abnormally | Cells track together across the curve | BMS balancer / bench supply |
| Storage SoC set | Before any long idle period | Bank parked at ~50–60% SoC | Charger/inverter + shunt |
| Cold-weather check | Onset of winter | Low-temp charge cutoff active | BMS temperature settings |
Notice what is not on that list: equalization, watering, deliberate full discharges, monthly conditioning cycles. Those are lead-acid rituals. Doing them to LiFePO4 ranges from pointless to actively harmful. The discipline with lithium is restraint — keep it in the window, watch the cells, and intervene only when the data says to.
How the Pieces Fit Together
If you follow only one thread through this guide, make it this: balance, depth, and temperature are the three things that decide whether your bank lasts five years or twenty. Monitoring is how you know they are holding. Capacity testing and cell diagnosis are how you confirm it. And the BMS — read correctly — is the early-warning system that ties it all together. Each linked guide below is a deeper dive into one of those pieces, written from the same bank on my bench.
None of this is exotic. I commission a bank, set the profile once, let Home Assistant watch it, and do a capacity test a year later to confirm nothing has drifted. The articles in this cluster exist so that when something does drift — a widening spread, a nuisance trip, a capacity number that has slipped — you can move straight to the diagnosis instead of guessing.
Frequently Asked Questions
Does a LiFePO4 battery need regular maintenance?
Very little. Unlike lead-acid, LiFePO4 needs no watering, equalization, or conditioning cycles. Real maintenance is verifying the charge profile is correct, watching cell spread through the BMS, and doing a capacity test about once a year. Keep it in its window and it largely runs itself.
How do I know if my battery bank has a bad cell?
A weak cell shows up as one cell that consistently races ahead on charge or sags first on discharge, trips the BMS early, and makes whole-bank capacity test lower than nameplate. Compare per-cell rest voltages and voltage under load; a healthy pack tracks together while a weak cell falls out of line.
What is the best depth of discharge for battery life?
For LiFePO4, holding usable depth of discharge to about 80-90% roughly doubles cycle life versus running to 100% every cycle. Quality cells are rated for 6,000-plus cycles at 80% DoD. Set your low-voltage cutoff to leave a small reserve rather than emptying the pack each time.
Why does my BMS keep tripping on charge?
An over-voltage trip on charge almost always means one cell reaches 3.65 V before the others, which is a balance problem, not an overcharged pack. Check your cell spread at the top of charge; a single high cell tripping the board points to drift or a weak cell rather than a charger fault.
Can I charge my LiFePO4 battery in freezing weather?
No. LiFePO4 must never be charged below 0 C (32 F) because it plates metallic lithium onto the anode and permanently damages the cell. Discharging cold is acceptable; charging cold is not. A working low-temperature charge cutoff in the BMS is mandatory for cold climates.
How often should I test my battery bank’s capacity?
Test once at commissioning to establish a baseline, then about once a year to track fade. Discharge a known load through a shunt and count the amp-hours that actually come out, comparing against nameplate. A slowly declining number is normal aging; a sudden drop points to a developing weak cell.